Wednesday, July 17, 2019

A super Saturday indeed!

My weaving guild conducts what they call "super Saturdays" several times a year. These daylong events give us the opportunity to go beyond what can be done in a two-hour meeting. I haven't been to very many of them due to scheduling issues, but I did manage to get to one last Saturday. WARNING: This is a very long post, but hopefully interesting enough to read to the very end.)

(Even though I have been to Peggy's house before, Google Maps managed to lead me astray. After I crossed a river I knew I shouldn't have, I stopped and ask directions from a nice man in a mini backhoe. I followed his instructions while Google Maps barked the exact opposite. That got me in the general area - well, actually to the exactly right spot, but I drove right past Peggy's house without realizing it. When I reached a describable location, I called for help.)

Being a scientist, Peggy is on a "journey of discovery" which in recent years has included growing, processing, and spinning flax. Her husband is a handy guy and helps by creating whatever tools she needs to get the job done - a true enabler. I neglected to take many photos while at her place, as I was a bit discombobulated (see above paragraph). Here are a few from the flax demonstration.


The flax fiber needs to be separated from the rest of the plant, which is accomplished through retting (a good crossword puzzle word) whereby the stalks are soaked for a week or so, to get the stem to rot. An alternative method is dewing - leaving the flax out in the weather where the daily cycle of dew and sunshine do the same job, but over the course of about six weeks. The dewed flax comes out gray in color, while the retted flax is, well, flaxen.


An interesting tidbit is the fact that flax is highly flammable, while the chaff is just the opposite. Flax came in handy when starting a fire with flint.


Peggy also raises sheep, which she keeps jacketed to protect the wool from the usual detritus of country living. She demonstrated fiber prep of wool, from fleece to wheel. Since I'm familiar with these steps, I took no pix, but I did pick up some tips like turn up the hot water heater the night before scouring and put the locks in mesh bags (like oranges come in) so you don't have one big clump of wet wool to deal with. I also learned that finding what is now considered an old fashioned washer - a top loader with a manual timer - may be hard to do. I hope my Maytag lives a long time.


For the second part of our super Saturday, we drove over to the not-quite-ready-for-prime-time business Wabash Woollen Works. Lisa and Michael saved a former hatchery from demolition and are in the process of turning it into a fiber mill/workshop classroom/event center, preserving the stone walls and utilizing windows and doors scavenged from local schools. Lisa is one of those go-getters who rarely sits still so she appears blurry in many of these photos. After we ate our sack lunches, she lead us on a tour of the new facility, which contrasted nicely with all the hand labor we witnessed at Peggy's.


I really wish I had been more with-it that day, wish I had not only taken photos but kept written notes as well. Since I didn't (and I have slept since then), some of the ensuing information may not be exactly correct. So don't quote me on any of this.


WWW purchases fleece and sells it as roving or yarn. The likelihood of the sheep being jacketed is nil, so the fleece must be cleaned. Above, a tumbler breaks up the dirt and vegetative matter and manure so that it separates from the fleece and falls out of the device. Below, the automatic washer runs the fleece through as many as five wash cycles, to remove the remaining dirt and lanolin. (Lanolin gums up the machinery.)


Now I'm a bit vague on how the fleece gets dried. Maybe in the same machine? Or the next? I think this machine's job is to "pick" the fleece - fluff it up so that it is ready to be carded. For the hand spinner, this is akin to using a flicker on the wool locks.


The next step is running the wool through the carder. Here fibers may be blended - in this shot, we have silk and cashmere on top of merino, I believe. The merino is green, so there obvious must be an opportunity to dye the fiber before this point in the process.


The output of the carder looks like roving ready to spin, but not quite. The fibers run every which way and don't spin up well, which brings us to the next machine.


Here, the carder results are attenuated - the fibers are aligned in one direction. I guess this would be like semi-worsted fiber.


Finally, we are ready to spin. Just like my spinning wheel has a leader to start the process, this machine has leaders for each spool of yarn being created. The machine is designed to automatically distribute the singles evenly on the spool, whereas on my wheel I have to move the flyer hooks manually. Very slick.


And of course, the singles need to be plied. Again, this machine evenly distributes the plied yarn on each cone.


At home, I set the twist of my yarn by soaking it in hot water for about 20 minutes, then swinging it around a bit and/or snapping it before hanging it over the tub to dry, which takes a day or three. A business can't wait that long, so they use steam. The yarn here gets steamed by traveling through those insulated pipes.


The yarn is transported through the steamer by this machine pulling it across the room. The yarn is dry by the time it is spooled, a distance of about 20 feet.


Now the yarn is ready to be wound into skeins, which is how it is sold. The finished product is priced by the ounce, and most skeins contain about 200 yards of yarn, but results vary.


Now, as if that weren't enough, there is also a needle felting machine. Roving is fed in from one side...


... and felt comes out the other.


But wait! There's more! There is also a wet felting machine which uses friction to create area rugs of thick felt. (That's a loom in the background, not the machine itself.)


I believe all the yarn is dyed using natural materials, many of which WWW grows, including some in the raised bed garden out front. They also offer natural dye workshops.


I was surprised to discover one may dye with daisy flea bane, which grows wild in my yard, and teasel, which grows almost everywhere around here.


The tags on each skein note the mordant (M) and modifier and sometimes even the water used. I think every dye book I own recommends using water with a neutral pH. But the outdoor spigots at my house are on a well - the water is very iron rich - and I know even the tap water has a certain amount of minerals in it. So now my next experiment with dyes may be to use different water sources, including distilled water and rain water and maybe snow melt.


There were questions about the rug yarn for sale, some of which appeared to be wrapped in a contrasting thread. So back to the carder(?) we went.


These photos do not show it very well, but the rug yarn has a cotton core. The roving is wrapped around the cotton core. To get the contrasting thread wrap, a different color wool is lined up along the rest of the wool on the conveyor belt feeding the machine.


It's like magic!


I have been to the Green Mountain Spinnery, in Vermont, where the machinery is very old and geared for a higher level of production than WWW. The spinning guild I belong to had a dye workshop scheduled at another local fiber mill this coming weekend, but due to the oppressive heat expected (the dyeing occurs outside), that event has been postponed. Like Peggy, I experiment with fiber (although I doubt I will ever grow flax), but I enjoy seeing how my handwork is achieved using machinery. Fun stuff!

Tuesday, June 25, 2019

One rug done

The spinning guild challenge project is done, just in the nick of time. The floor runner is approximately 5' long and 15" wide. While I am pleased with the results, I wouldn't make another rug from Shetland; I chose it because it is supposed to be pill-resistant, but it is also rather fuzzy.


The cotton/poly edging at each end is secured with an overcast stitch. Then I created a fold using Philippine ties, weaving in the ends. The instructions for these finishing methods may be found in Finishing Touches for the Handweaver, by Virginia M. West.


How to photograph the finished product? Show the end striping...


... and the front and back...


...and then a couple of full length shots.


At the spinning guild, we were encouraged to enter our projects in the county fair. From what others have said, the judges are not very familiar with fiber arts, but it might be worth the effort, just to see what they say. Stay tooned!

Tuesday, May 21, 2019

The old swatcheroo

My spinning guild issued a challenge: spin for a project, then execute the project. Lucky for me, I already had a project like that sorta started: weave a runner for in front of the sofa. With the deadline looming, I am (finally) putting the pedal to the treadle.

But first. I decided I should make a swatch, to see if my assumptions were correct. Spoiler: some were, some were NOT.


One assumption was that I would weave 3 ppi (picks - or rows - per inch). That turned out to be false. The actual ppi is 5, which means I need to spin more yarn. Also, there was virtually no shrinkage of the swatch, so I don't have to worry (much) about that.

The roving I spun is not dyed. My assumption that the natural colors would play well together? Correct. The dark brown and light brown are both Shetland, which I chose because of its reputation to be pill-resistant. The white "art yarn" is my poor attempt to spin woolen, using Dorset Polypay. The yarn is 3-ply, because I was trying to imitate some commercial 3-ply rug yarn. The Shetland came out super bulky, at 5 wpi (wraps per inch), the Dorset Polypay is bulky, at 7 epi. This variation will give the runner some visual texture (she said optimistically).


Yesterday I put on my big girl panties and warped the loom with 'Khaki' cotton/poly carpet warp. I really hate warping because I can't seem to get even tension across the loom, but this time it worked relatively well. The epi (ends per inch) is 5. (Pay no attention to the bright super bulky yarn - I use that to spread the warp.)

Although I wove only 10 rows of the carpet warp on the swatch, it seemed like enough to assume its quarter-inch length would translate to 40 ppi. On my rigid heddle loom, though, it was more like 35, even with beating. Today I finished up the edging at one end, securing it both fore and aft with a row of cross over stitches. This edging will be folded under (I think).

I did some cypherin' to figure out how much of each yarn to use where. The runner is supposed to be 18" wide and 72" long. As of right now, I plan to do the following:

  • 2" dark brown
  • 3 picks white
  • 3" light brown
  • 3 picks white
  • 2" dark brown
  • 3 picks white
  • 3" light brown
  • 3 picks white
  • 2" dark brown
  • 3 picks white
  • 3" light brown
  • 3 picks white
  • 36" dark brown
  • 3 picks white
  • 3" light brown
  • 3 picks white
  • 2" dark brown
  • 3 picks white
  • 3" light brown
  • 3 picks white
  • 2" dark brown
  • 3 picks white
  • 3" light brown
  • 3 picks white
  • 2" dark brown

I'm not exactly following the implied rules of spinning for the project, as I started spinning with a general idea of how I would use the yarn. I'm making the yardage determine the pattern instead of the other way around. But spinning bulky yarn is new for me, I have a lot of Shetland to use up, and the white was serendipitous. Good enough for me.

Tuesday, April 23, 2019

Documenting dyeing

I've been rather resistant to documenting my dyeing escapades beyond posting in my blog. Then I KonMarie'd my kitchen, which created an empty cupboard that immediately filled up with hand spun yarn and the results of my dyeing experiments. However, the cupboard didn't seem like an improvement over keeping all that fiber in big plastic bags in a bedroom closet. I decided to bite the bullet and create a notebook of dye samples.


The first step (after purchasing some file folders from Office Depot) was to figure out just how much hand dyed yarn I had. I hauled it all out to the dining room, then searched the blog for digital documentation. Wow. That's a lot of dyeing.


I have the necessary hole-punching tools, plus a paper cutter, so I cut up the file folders to be about half the size of a piece of notebook paper and punched away. Most of the skeins had to be unwound at least partway, to get an 8" sample to attach; in the future, I will leave a bit hanging loose to eliminate this step.

I didn't want to duplicate all the details of each dye session, so I kept jottings to a minimum while including the blog post date for future reference. I chose not to list the yarn's location because that tends to change from time to time. Also, I didn't worry about making it look pretty.


For yarns dyed in workshops, I inserted handouts. If I had notes from my own dyeing episodes, I taped them to notebook paper and included them. Then I made a corny cover for the three-ring binder.


In order to avoid having to squint at the little tags attached to the skeins, I made a big tag for each set. While I may have to empty a shelf or two to find the yarn I am looking for, this system should save me time and effort.


The little tags on each skein indicate the weight and yardage. It might be useful to have that recorded somewhere (Ravelry?) to reference during project planning, but that seems like a lot of extra work. I've already used some of my hand dyed, for a tapestry sampler. Maybe after another project or two, I'll change my mind.

Once I am done with the hand dyed, I plan to do something similar with the hand spun.

Do you document your fiber projects?

Friday, April 19, 2019

Under the wire

I was working on a pair of socks for my son's girl friend when they announced they were coming to visit... in a week! The socks were about half done, but I calculated how much to knit per day and decided I could get them done by then. A couple of days my hands protested, and the socks were still a bit damp from blocking, but they were delivered on time.


Pattern: Short-row Toe and Heel Basic Socks, by Wendy D. Johnson
Yarn: Brenda and Heather Yarns Fluffy Feet, in 'Napoleon' and Simply Socks Yarn Company Simply Sock, in 'Natural'
Needles: US1
Modifications: None


This is the first time I have used the BaH yarn. The "natural" stripes are a bit yellow, didn't quite match the SSYC "natural". If I had realized this fact at the start, I would have planned the socks so that the two "natural" colors were not next to each other. Oh, well. Wabi sabi. The recipient appreciated them regardless.

Sunday, April 14, 2019

Serendipity, baby!

I'm sorry I've been so lax in the blogging department. My SO and I enrolled in a pottery class, plus there have been plays to see and a granddaughter to take on a field trip and other assorted activities that just piled up.

One activity was a trip to Wisconsin to visit my SO's son and family. Initially, we were invited to my nephew's birthday party near Chicago, but hey, it's only another 90 minutes to Milwaukee, where hey, it's only another 90 minutes to Two Rivers. In other words, we spent at least three hours in the car every day we were gone. That's a lot of sitting!


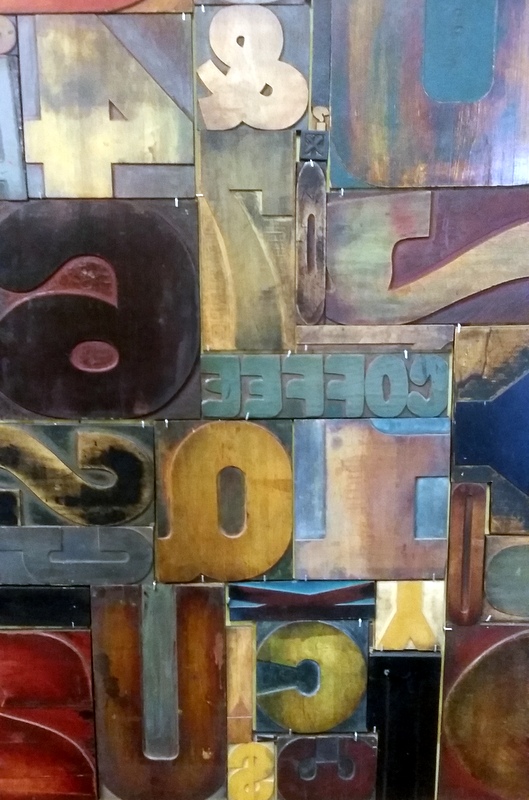
What's in Two Rivers? Not much besides the Hamilton Wood Type Museum. My interest in letterpress started when I found an antique print tray at the Natural Fiber and Yarn Company in Grand Rapids, OHIO. The handle said Hamilton Mfg. Hamilton is a family name of mine, so I had to buy it. One thing led to another (including viewing the movie Pressing On), and I decided if we were ever in the area, we should visit the museum.


I'm always seeing things to weave, and I think wood type would make a great tapestry.

We also stopped in at the Wisconsin Museum of Quilts and Fiber Arts in Cedarburg. The current exhibit was (and still is, until the end of the month) Native Fiber. I didn't take many pix (and I apologize for the quality of the following), but had to record this piece, since some of the cones are made from clay and, as I said, I am taking a pottery class.


And if visiting these two places was not enough, when we reached the fiber arts museum, a fiber arts tour was in progress! We didn't have time to visit all the stops, but did make it to The Arts Mill in Grafton, where I chatted up a woman teaching eco dyeing.

Meanwhile, I have been knitting and spinning. The knitting is for a pair of socks for my son's girl friend. They announced an impending visit this coming Tuesday, so I am frantically trying to finish them up before then. The spinning is experimental, so nothing to show for that yet. OH! And I bought a fleece from a local farm, a Jacob. There's always something, right?

Saturday, March 09, 2019

Back to Portland

That's Portland INDIANA, not Maine or Oregon, where the Jay County Fiber Arts Festival is held each year. I skipped 2018 because I went to PlyAway in Kansas City. This year, I decided to take a class with Kate Larson, to see what all the hubbub was about, bub.

Among my spinning and weaving coterie there are several fans of Kate Larson. My SO and I visited Moontree Studios to view her show there. Now Kate is the editor of Spin Off Magazine, but she continues to teach.

I decided to take the class that met Friday afternoon, partly because it was the only one that specifically mentioned needing to know how to spin and ply, partly because it suited my lazy retirement schedule. The class was Gradient Yarns: A Spinner's Study in Shifting Shades. I wasn't sure what to expect, but given my still rudimentary understanding of spinning yarn, I figured I would learn something new. And I did.

Most of my spinning is of fiber in its natural colors - natural, gray, brown, etc. So working with gradient colorways was a fun change of pace for me. I do know that color is an optical thing - some colors look brighter or sadder or even like a different color, depending on what they are paired with. My favorite anecdote that illustrates this is how I painted my bedroom lavender, then installed gray carpeting. The gray sucked the blue right out of the walls, turning them pink. A more recent story involves some red Tunis wool I am spinning - the gray that is mixed in disappears by the time it is spun and plied.

Below are three samples of the same colorway. The one on the left is thread plied - a single plied with a single thread of silk, the one in the middle is simply a single spun worsted, and the one on the right is core spun - fiber spun around a thin core of something relatively sticky like silk/mohair lace weight. See the difference?


Another example of one colorway, thread plied on the left, a spun single on the right. Now I am wondering what will happen if I thread ply a single of the red Tunis with white, gray, or black. Must sample to find out.


In class, after warming up with a luscious yak-silk-merino blend (three fibers that play well when all together, not so nice in twosome combos), we spun three singles, then thread plied one and marled another with gray. Obviously, the gray saddens the colorway, but the black thread brightens it. Magic.


I also received a bit of a goose regarding documenting one's spinning. Kate had a range of office supplies to assist with that, including sticky dots. By wrapping the yarn around a folded index card, then attaching the sticky dots, the fiber can be mounted onto a heavy page and put in a binder.


I also tried my hand at adding beads while chain plying. No pix because the result was quite a mess, but I will try again with some fiber I am more familiar with. Kate also demonstrated core plying, something else I want to try. In fact, I was wondering how that might work for creating a rug yarn.

This type of class really opens my eyes to many new possibilities when it comes to spinning yarn. The class size was much more amenable to the learning process, compared to PlyAway. Also, Kate is incredibly personable, friendly, helpful, encouraging, and knowledgeable. If you ever have the opportunity to take a class from her, DO IT!

A visit to a fiber fest is also the opportunity to BUY STUFF. When I first arrived, I ate lunch (sloppy Joe, Fritos, and PIE), then cruised the vendors for ways to spend my money. I kept running into people I know, which slowed me down a bit, but I saw a frame loom I was interested in. Alas, when I returned after class, the looms were apparently all sold out. I resisted all the fiber, so the only item I purchased was Kate's book, Wool: the Practical Spinner's Guide. Only after arriving home did it occur to me I should have had Kate autograph it.

One more lesson learned: when I attended PlyAway, I signed up for as many classes as I could. By the time we left, I was exhausted. Yesterday, on the drive home, I was wishing I had enrolled in Kate's other two classes. But then I realized how tired I felt. A novel I read uses picking raspberries as a metaphor - you don't need to pick all the raspberries to savor the one in your mouth. Also, my brain felt full enough of new ideas - no need to overdo it.

Thursday, March 07, 2019

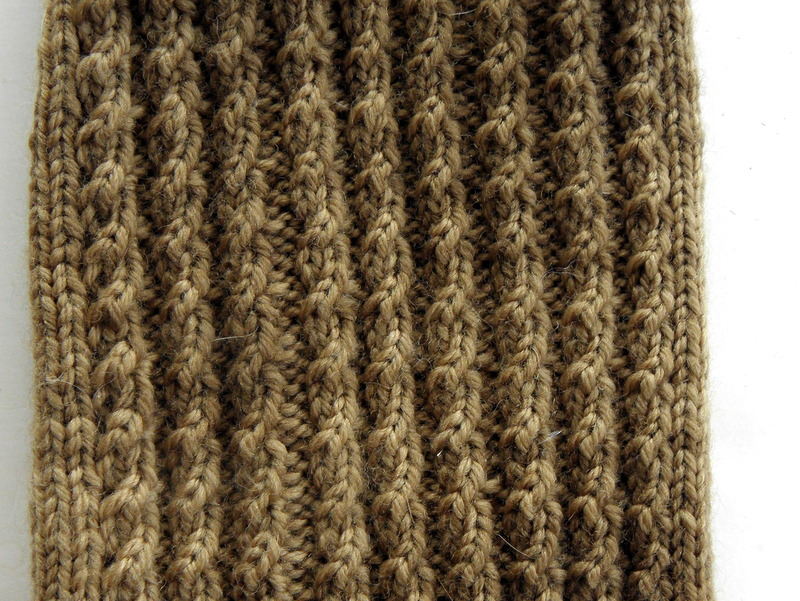
Walnut baby cable rib socks

I knit both my SO and me a pair of baby cable rib socks lo, these many years ago (2011) in Fortissima Socka Degradee Color fingering yarn. I really liked how they turned out because of the gradient colorway. Alas, they did not hold up very well, wearing thin on the soles. So I decided to knit us some more. I finished mine about a year ago, and just this past week, finished my SO's.


Pattern: Short-row toe and heel basic socks, by Wendy D. Johnson, and baby cable rib, by Charlene Schurch.
Yarn: S.R. Kertzer On Your Toes 4 Ply with Aloe Vera, in brown, and unknown base yarn, hand dyed with black walnut, by Little Shop of Spinning
Needles: US1
Modifications: not really


Even though I have knit these socks before, this time I ran into a lot of (self-inflicted) trouble, especially with the toes. The dark brown yarn was difficult for my old eyes to see. Then I also did dumb things like continue the rib pattern across the sole instead of using plain stockinette. But I persevered and eventually got 'er done.


I've already cast on another pair, as I always like to have a portable knitting project on hand. But I would also like to complete some mittens to match a scarf and hat and sweater. Hopefully, both mittens and wool socks will become unnecessary soon, if this wacky weather ever decides spring has sprung.

Thursday, February 07, 2019

Spinning for projects quandry

As I mentioned in a previous post, I have been spinning with projects in mind - a rug and a sweater/wrap. I have two spinning wheels, a Kiwi2 and a Joy2, both from Ashford. I am spinning the fat rug yarn on the Kiwi2, the sweater yarn on the Joy2. This way I can work on both project yarns without having to swap out bobbins.

Single, on bobbin

The sweater roving is pink and gray, feels like a mixture of breeds (hopefully, I will find something with the name of the fiber on it) and is kind of coarse. Despite a fair amount of VM (vegetable matter), it spins up nicely. It did bleed a bit when soaked to set the twist.

A little bleeding

Lately, I have become enamored with three-ply, which is good for the fat rug yarn. I'm not so sure about using three-ply for the sweater, though. The pattern calls for worsted weight yarn, but my three-ply is more like aran or even bulky. Not that I couldn't adjust the gauge and knit it with a heavier yarn, I'm just not sure I want to.

7-8 wraps per inch

Three-ply yarn knits up smoother, especially in stockinette, because the yarn is round; it also pills less than 2-ply. An alternative to knitting with the aran weight yarn would be to spin finer singles and 3-ply those into a worsted weight yarn. That is an option.

3-ply

When plying singles, invariably one bobbin runs out before the others. When that happened with the 3-ply, I plied the remaining singles into a 2-ply. Now I have samples of each, to knit swatches with.

9 wraps per inch

2-ply on left, 3-ply on right

The Veronika cardigan pattern has a lot of positive ease, so gauge is not critical. Since I don't really like a lot of positive ease, I plan to knit the smaller size, in which case I might care more about gauge. Also, I don't want to run out of yarn since I won't be able to buy more of this roving.

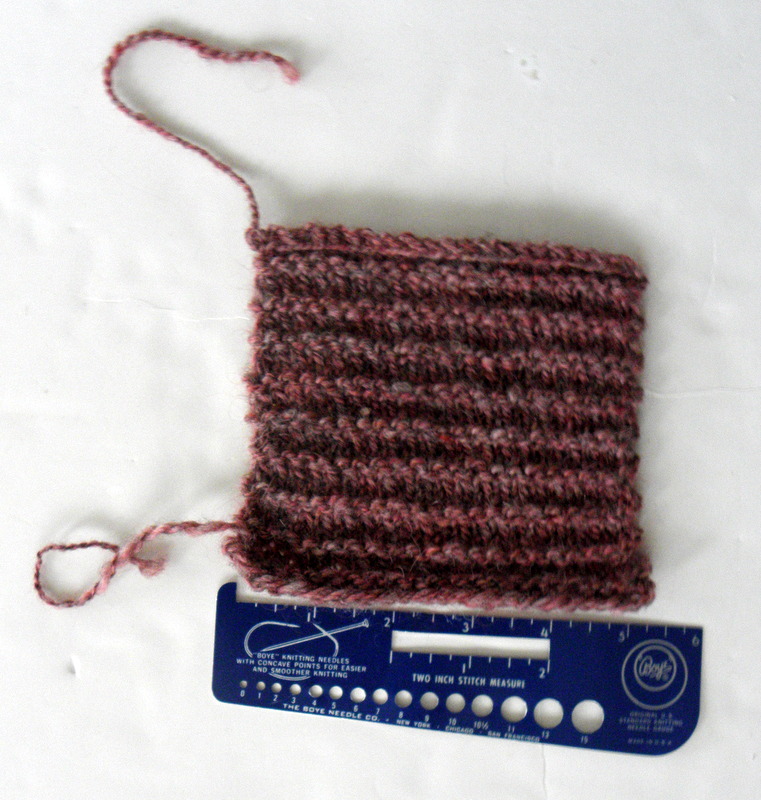
2-ply swatch, in purl ridge stitch

About 30 rows per 4", aiming for 26

After swatching the worsted weight and hitting the stitches-per-inch gauge, I thought, This is it! But I am having second thoughts, so I will knit up the aran weight, to see if I like it better. Also, I am playing around with the idea of widening the stockinette area between the garter ridges, then knitting the garter ridges in a contrasting color, like black.

16 stitches per 4"

Decisions, decisions.

Sunday, February 03, 2019

Polar vortex dyeing, with dyers coreopsis

While looking forward to days of frigid temps, I decided it was a good time to dye. There were several choices available from my dye stash, but I chose dyers coreopsis (coreopsis tinctoria). Per usual, it was an experiment.

Working from Jenny Dean's Wild Color, this time I tried extracting dye from the flowers by pouring boiling water over them and letting them steep, instead of simmering the blossoms. A true experimenter would try it both ways, but I had only 200g of flowers to work with. Then I mixed and matched mordants and modifiers.


One thing that never ceases to amaze me is how the dye bath can look one color, but the yarn turn out another. And then the yarn samples differ depending on the mordants used. Post-dyeing modifiers create even more shades of color.


I don't know what I did wrong, but some of the yarn skeins developed dark patches. This occurred during the post-dye application of an alkali modifier. But I still wound up with a nice assortment of colors and shades of colors.


From left, in pics above and below:

  • no mordant/no modifier; 
  • alum mordant/no modifier; 
  • no mordant/alkali modifier;
  • alum mordant/alkali modifier; 
  • rhubarb leaf mordant/no modifier;
  • rhubarb leaf mordant/alkali modifier; 
  • no mordant/iron added to dye bath; 
  • alum mordant/iron added to dye bath;
  • rhubarb leaf mordant/iron added to dye bath.


Below: no mordant; from left, no modifier, alkali modifier, iron in dye bath.


Below: alum mordant; from left, no modifier, alkali modifier, iron in dye bath.


Below: rhubarb leaf mordant; from left, no modifier, alkali modifier, iron in dye bath.


Below: from left, no mordant, alum mordant, rhubarb leaf mordant; no modifier.


Below: from left, no mordant, alum mordant, rhubarb leaf mordant; alkali modifier.


Below: from left no mordant, alum mordant, rhubarb leaf mordant; iron in dye bath.


How do I keep track of what is what? I create a "cheat sheet". Each skein is assigned a letter, written in Sharpie on a piece of plastic that is attached to the skein all through the process. The information is transferred to each skein's info tag, which contains fiber information on one side (in this case, Cascade 220, plus length and weight) and dye information on the other.


Another question you might have is why I added iron to the dye bath. That was half experiment, half accident. The experiment part arose from the fact that some natural dyes look different on vegetable fibers like cotton than they do on protein fibers like wool or silk. So I purchased some yardage of muslin ("natural" - unbleached - on the right, below) from Dharma Trading Co. However, I wasn't sure how to handle it. So I threw a yard into the dye bath, which produced a light tan (middle sample, below). Another yard was pretreated with an iron mordant. I neglected to rinse the iron out of the material before putting it into the dye bath, which resulted in "saddening" the dye color; that produced an olive green (left sample, below). I also discovered that rinsing muslin is much different from rinsing wool yarn. So much color came out of the unmordanted sample that I treated it to a vinegar bath in an attempt to set the color, but that didn't seem to make much of a difference. I should do more research before continuing with the cotton muslin aspect of my dye experiments.


Since the dye bath had been contaminated with iron, I decided to throw in a few more skeins of yarn. All in all, this dye experiment took three days, plus a day for clean up. A tiring but satisfying way to spend the polar vortex. What did you do?